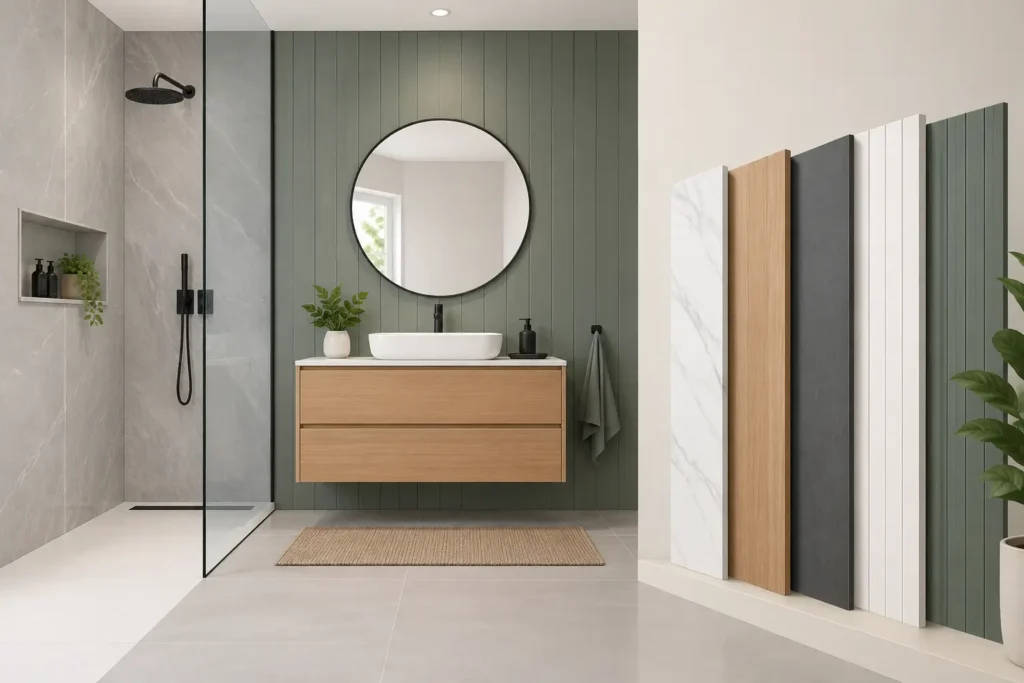
A tired bathroom does not always need a complete redesign to feel fresher, brighter and easier to live with. Bathroom wall panels can replace dated tiles or cover selected areas with a clean, continuous surface that is designed to cope with everyday moisture. They are particularly appealing when you want fewer grout lines, less cleaning and a well-finished result without making the room feel overly clinical.
The right panel is not simply a matter of choosing a colour you like. Its performance depends on where it will be fitted, the condition of the wall behind it, the quality of the joints and how it sits alongside your shower, brassware, furniture and flooring. A considered plan at the outset can prevent the small compromises that become noticeable once the room is in use.
When bathroom wall panels are a good choice
Wall panels work especially well in shower enclosures, around baths and behind basins, where tiled surfaces would otherwise need regular grout cleaning. They can also be used across a full feature wall to create a more unified look in a compact bathroom, cloakroom or en-suite.
Their main advantage is the surface itself. A properly fitted panel has far fewer joints than tiles, so there are fewer places for soap residue, limescale and mildew to settle. This makes day-to-day care simpler, particularly in busy family bathrooms and rental properties where a practical finish matters as much as appearance.
They are also a useful option where a faster refurbishment is preferred. In some circumstances, panels can be fitted over sound existing tiles, avoiding the disruption of removing a whole tiled wall. That said, this is only sensible when the existing background is secure, level and dry. Covering loose tiles, damp plaster or a failing shower wall only hides the problem for a while.
There is a visual consideration too. Large-format panels create broad, uninterrupted areas of colour or pattern. A stone, concrete, marble-effect or timber-look design can bring character to a bathroom without the busyness of numerous tile joints. In a traditional Dorset home, a softer mineral finish may suit the setting; in a more contemporary extension, a deep matt panel can give the room definition.
Choosing bathroom wall panels for the space
Not every panel is made for the same job. Shower-grade panels are designed as a waterproof wall covering when fitted with the correct trims, sealants and installation method. Decorative cladding intended for a splashback or low-moisture wall may not be suitable inside a shower enclosure. Always start with the location, rather than choosing a finish first.
Material and surface finish
Many bathroom wall panels have a waterproof core or backing with a decorative, hard-wearing face. The construction, thickness and edge detail vary between ranges, which affects both durability and the finished appearance. A thicker, more rigid board can feel more substantial and may better disguise minor irregularities in a wall, but it still needs a sound surface behind it.
Gloss finishes reflect light and can make a smaller room feel more open, though they may show water marks more readily in hard-water areas. Matt and textured surfaces often give a more understated, premium look, but cleaning should remain straightforward. Very pronounced texture is best avoided in the wettest areas if easy maintenance is a priority.
Pattern scale matters more than many homeowners expect. A dramatic veined marble design can look excellent on a large shower wall, yet feel crowded in a narrow cloakroom. Requesting samples and viewing them in the room’s natural and artificial light helps reveal whether the undertone works with your chosen flooring, paint and sanitaryware.
Size, joins and trims
A panel with fewer joins generally gives the calmest appearance and reduces potential maintenance points. Measure walls carefully, including awkward returns, sloping ceilings, window reveals and boxing around pipework. A panel plan should establish where vertical joins will fall before any material is ordered.
Trims are not an afterthought. Internal corners, external corners, end caps and joining profiles protect edges and create a neat transition. Some installations use discreet colour-matched trims; others use polished chrome, black or brushed metal-effect details to coordinate with taps and shower frames. The best choice depends on the bathroom’s wider scheme, but consistency is what makes the room feel properly resolved.
Plan the wall before fitting panels
The finish on the front is only as reliable as the preparation behind it. Before fitting, check for leaks, signs of damp, crumbling plaster, movement in studwork and uneven walls. Resolve plumbing issues first, especially around shower valves and bath waste pipes. A concealed leak behind any wall finish is expensive and disruptive to put right.
Consider practical details early. Where will the shower valve, riser rail, niches, mirrors, lights and accessories be fixed? Holes for pipework and controls must be accurately cut and sealed. If a heavy mirror cabinet, grab rail or wall-mounted vanity is planned, provide suitable timber noggins or fix into an appropriate structural background rather than relying on the panel alone.
Ventilation should be part of the same conversation. Even waterproof wall finishes benefit from a bathroom that can clear moisture efficiently. An extractor fan sized for the room, correctly ducted and used after bathing, protects paintwork, ceilings, furniture and window frames as well as the wall panels.
It is worth deciding how panels will meet other finishes. You may choose panels within the shower and tiles elsewhere, or take the panel behind a basin to create a simple splashback. In many bespoke bathrooms, a balanced mix of materials looks more considered than covering every wall with one product. Tile can add texture underfoot or define a feature area, while panels keep the most exposed walls easy to maintain.
Installation quality is what keeps water out
Bathroom wall panels are often described as waterproof, but the complete installation is what protects the wall structure. Correct adhesive coverage, accurately formed corners, sealed cut edges and compatible trims all matter. Gaps around shower fittings, bath edges and panel joints are where problems tend to begin when work is rushed.
The wall must also be suitable for the chosen fixing method. Solid masonry, plasterboard, existing tiles and timber stud walls can each require a different approach. In shower areas, the manufacturer’s installation guidance should be followed precisely, including curing times for adhesive and sealant before the shower is used.
This is one reason a coordinated bathroom project can offer real peace of mind. When the design, plumbing, preparation and fitting are planned together, responsibility does not get passed between separate trades. At Hale & Murray, our team can help homeowners consider the wall finish alongside fitted bathroom furniture, lighting, storage and the practical work required behind the scenes.
Cleaning and looking after panelled walls
Routine cleaning is usually straightforward: use a soft cloth or non-abrasive sponge with warm water and a mild bathroom cleaner, then dry the surface where possible. Avoid abrasive pads, harsh powders and strong solvents, as these can dull or damage the decorative finish.
Inspect sealant lines periodically, particularly around a shower tray, bath and fittings. Sealant does not last forever, and replacing a tired or lifting bead promptly is a small maintenance task that can prevent moisture reaching the wall behind. If you notice movement, staining or a persistent musty smell, investigate rather than continuing to use the shower as normal.
A well-chosen panel system is not a shortcut around good design. It is a practical material that can look smart for years when it is specified for the right area and fitted with care. Bring samples into the room, think through the details that will be used every day, and allow enough attention for the work behind the visible finish. That is how a bathroom becomes easier to maintain without losing the sense of quality that made you want to improve it in the first place.